Welcome! This is the place I come to for creative inspiration, and sharing my love of card making, scrapbooking, and all paper crafting! I hope you enjoy! Thanks for visiting! gm5casey@gmail.com

Tuesday, October 16, 2012

It's Fall Y'all!!

Happy Tuesday Crafters! Loving the Fall weather in Colorado this week. Especially now since I have the week off. You know where you can find me! Today's post is a card for the Whimsidoodles October challenge called, It's Fall Y'all!

 
I created this card using an adorable free Digi stamp from Whimsidoodles. It is an A2 size card made using Recollections paper from Michaels. I colored the image using my Copics. I used a Nestibilities label die for the background base, An embossing folder by PC for the card edge, I cut some leaves from the Artiste Cricut cartridge, and some green Stickles.
 
For the texture on the leaves, I crinckled them up and then inked them with some fall color inks I have by Memento. Some of the leaves are popped up on foam adheasive squares from my stash
 
The last detail on the card is faux stitching. I used a gold Sakura pen and there you have it! I made this card for my Awesome Hubby, who supports me 100% in all my crafting endeavors.
 
I thank you for stopping by to have a look, and best wishes for a great week!
Don't forget to go by and join in on the fun challenge HERE!!
 

Tuesday, October 9, 2012

Happy Halloween

Hello everyone! And Happy Fall! It's Gina back with my October post for Cricut Is Close To My Heart with a project using Close To My Heart products to share with you today.
This is a 6x6 card cut from the Art Philosophy cartridge. I thought it couldn't get any better, then along came the Artisite cardridge! I am having so much fun creating with this new cart! Back to the card, lol! All the papers used for this card are from the CTMH Moonlight pack. The fun shape behind the pumpkin was cut from the Artiste cart. Here are the rest of the materials used:
Sunset ink by CTMH
Smokey Plum ink by CTMH
So Grateful stamp set by CTMH
Chipboard element by CTMH
Flowers by Studio G
Rhinestones by Recollections
Scotch ATG gun
Scotch Adheasive foam squares
I thank you all for stopping by today to have a look and I sure hope you are enjoying cooler weather in your neck of the woods. We had some snow in my area of Colorado this weekend. Time to drag out the flannel sheets!!! Have a wonderful day everybody!

Sunday, October 7, 2012

Halloween Card

Good Morning everyone! I hope you are all enjoying your weekend. It sure has been chilly here in Colorado! To me that just means more inside time spent in the craft room! Today's post is a card I have created for the Simply Crafts October challenge for their anniversary.


Here are a list of products used to make this 6x6 card:
 
Recollections Paper
MME paper pack-Haunted
Prisma colored pensils
Gamisol oderless mineral spirits
Spellbinders Die
CTMH Chipboard sentiment
Whimsiedoodle Digital Image-Standing Lizzie
Martha Stuart Web corner punch
Momento Tuxedo Black Ink
Rhinestones by Recollections
Studio G Bat stamp
Stickles
 
I thank you for stopping by and having a look at my project. Have a wonderful week my friends! Until next time!
 

Sunday, September 23, 2012

The Greeting Farm Lil' Sprouts Contest!


Hello everyone! Our post today is a card created entirely by my son Sean! He wanted to enter a challenge on The Greeting Farm blog using this Birthday Ian stamp by TGF.

 
Sean made an A2 size card using Recollections paper. the stamp from TGF, an oval die, and a Cuttlebug folder to emboss the blue layer. He used a Close To My Heart stamp and ink for the sentiment. Sean cut his sentiment banner by hand and used Mom's ATG to adhear all pieces together.
Sean is 11 years old and really loves helping in the craft room whenever possible. He even claimed ownership of my Cricut Personal when I upgraded to my Expression! LOL! Wish us luck everyone, this card is to be entered into the challenge and winners announced later in the week. WE thank you for having a look. See you soon!

Monday, September 17, 2012

Whimsie Doodle Card


Good Morning! Today I have a card for you that I made with a Digital stamp from Whimsie Doodles, for the September challenge on the blog. They have adorable digital stamps. The image I have chosen for today is Pencil Pixie:
The challenge is a Back To School theme. I thought she was so adorable. It is an A2 size card. I colored the image with Prisma colored pencils and oderless mineral spirits to blend. I really love this technique. The papers I have used are from the Flirty paper pack by Close To My Heart.
The stamp set is called It's Your Day, and the ink color is slate. Idid some faux stitching with Sekura Gel Pens and used a brad flower from my stash. I hope you like the card for today. Until next time, happy crafting!!

Tuesday, September 11, 2012

Halloween Treat Box

Good Morning fellow crafters!  Here with a post for you today of a treat box for Halloween using Close To My Heart products that can be found in the new Fall/Winter catalogue. I love Halloween, so I am getting a good start on all my cards and projects early!

So here is what I have made for you today using the brand new Cricut Artiste cartridge from CTMH! This cartridge is amazing!! I thought AP was great, but this one is a must have for sure! Using this fantastic cart, I cut the milk carton on page 46 at 4 inches. The rosette is on page 77 cut at 1.25. The tag is from page 33 @ 2 inches. All the papers are from the Halloween collection by CTMH called Moonlight.
Here are all the elements cut before folding and asembling. I used a 1.25 scallop circle punch for the shape to go in the center of the rosette. the Artiste cart comes with an instruction guide to help with putting the 3D items together. So easy to follow, and not much adheasive required. Nice!
Next came stamping. I purchased the stamp set Perfect Fit-Halloween with this project in mind. The images are smaller and perfect for rosette centers and tags. I used CTMH black ink and did some heat embossing of the image on the tag.
Last thing to do is finish assembly and decorations! I used the black ink again to ink up some edges, added a Martha Stewart adheasive border around the carton, and this super cute clothes pin with Frankenstein on it to close the box. A little CTMH twine, and a Jolees Boutique sticker on the tag, and there you have it! All the finishing decorative items can be found at Michaels.

I sure hope you have enjoyed looking at my project and have a look at the Cricut is close to my heart blog to check out the new Artiste cartridge and see for yourself what you can create! Until next time, Happy Crafting!!

Tuesday, August 14, 2012

Life Is A Journey

Good Morning fellow crafters, I am back with another post I am sharing  today on the Cricut Is Close To My Heart blog. I was able to attend a scrapbook expo here in Colorado Springs a few weeks ago and got a chance to see great new products and play around with some new things I had never seen before. I came away with a lot of inspiration and met a lot of people. What a great community of folks our passion for paper crafting brings together! So, now on to today's card!

The card is an A2 size card, top fold that I had fun creating at a Make & Take. For today I used the Victory paper pack from CTMH. I chose a few papers from the pack so they would coordinate together. To begin, I selected a 2.5x2.5 square of one of the papers to make a cute windmill.
Here is a shot showing where to mark the paper for clipping the corners towards the center, and the next photo simply shows how to fold the corner in towards the center.
Next, I chose a cute stamp set called Life Is A Journey. I stamped this on the layer underneath where I am going to place the windmill. The ink is Olive. All the elements for the card are simple and it was very easy to put together.
Since the cardstock for the base was light enough to see a written message on the inside, I decided to leave off the piece I would put on for writing the message, and instead, I stamped a line of trees across the bottom. It might be hard to see, but I also stamped it a few times in second generation to add some depth. Just a little something you can do with your stamps to add interest to the inside.
I inked the edges of the pieces, and attached a stash button to the center of the windmill. Here is the finished card! I chose to make this a more masculine card that can be used for encouragement, or just to celebrate changes in someones life. I hope you like it and stop by the Cricut Is Close To My Heart blog to say hi or leave a comment! I can't wait to come back  with a new post featuring the new Cricut cartiridge for CTMH called Artiste. I just received my package this morning and can't wait to play. Have a wonderful day everyone!

Monday, August 6, 2012

Geo Die

Happy Monday everyone! Seems like I have not posted for a long time, just having so much fun this summer. It is winding down and school starts in a few weeks, so it will be back to work for me! I wanted to share this card made from a neat Die that I found at a scrapbook expo in Colorado Springs a few weeks ago. It is called a Geo Die by POP UPS Etc. They have beautiful geometric designs. You use two sided paper cause there is some folding going on and shows the other side of the paper but it is so easy, and you get a unique design.
                                                                        The card was made with a pre-made 4x6 base and I used Bo Bunny paper from the Little Miss collection. The stamp is from CTMH as well as the ink. That is Cocoa, and I also used a little smoothie twine from CTMH. I am trying to build up my stash of thank you cards, and I thought this one turned out nice!!
I hope you have a wonderful week and I thank you for stopping by to have a look! See you next time!

Wednesday, July 25, 2012

July 4th LO


Good Morning Everyone! back with another post to share with you today.This is my post for the Cricut Is Close To My Heart blog. My creation is a layout for some 4th of July photos we took at a family gathering. I know the Holiday has come and gone, but if you are anything like me, you are a little behind. I think I'm doing good since we do have a few days of July left! LOL! Here is what I have come up with:


This photo shows some of the papers I have chosen for the LO. These are from the Super Hero pack. Obviously perfect for the theme. Once I made my sketch, I looked through my carts for the elements. I found the phrases from Create A Critter and Simply charmed. I chose the stars from the AP cart.
I simply cut a variety of strips in different thicknesses and clipped the ends to create a flag. I decided this 12x12 LO would be for one special photo, so I would not have to cut anything down. I matted a 4x6 rectangle and decided it should be front and center. After laying out my elements in a pleasing manner, I decided to add some CTMH Twine and to bling up the stars a little bit.
To do this, I ran some of the stars upside down in the xyron so they were sticky on top and then glittered them with some Prisma glitter. Some of the stars have been popped up with foam tape for some dimension.
Here is a photo that kind of shows the dimension and some sparkle. I thought it turned out really well!
I hope you have enjoyed the project for today's post and hope that you stop by the Cricut blog to say hello or leave a comment. Remember to come back soon for another awesome project featuring all the great supplies CTMH has and please contact me so I can get you everything you need to do a layout of your own! Thank you for stopping by and have a wonderful day!

Tuesday, July 24, 2012

Christmas in July

Hi All!

I have a post today that I will be entering in the My Craft Spot Challenge #63. The theme is Christmas in July and I thought I would give it a try!


This is a 6x4 premade card base from my stash, plain white. I used Christmas papers from My Minds Eye. The adorable stamp is by Penny Black. I colored the image with watercolor pencils, which I am fairly new at. I do not own any copics and thought I had better see if I like coloring before I invest so much money. I cut the circle scallop @ 3.5 from CTMH AP cart. I added a few recollections brads, stamped the sentiment from a Stampin' Up stamp in CTMH Blush ink. I hope you like it. Thanks for stopping by today. See you next time!

Wednesday, July 18, 2012

Tag Card

Happy Wednesday! Today I thought I would share a card with you that I am going to enter into Cricut Cardz Challenge #112 over at Cardz TV with Mary. The challenge is to make a card with/using a tag.

Materials:Roxy Paper Pack-CTMH
Rosy Regards Stamp Set-CTMH
Vineyard Berry, Blush, Olive, New England Ivy Ink-CTMH
American Crafts Ribbon
Assorted embellishments from Bohemian Assortment-CTMH

The card is 5x7, the tag is cut from AP page23.
Thank you for stopping by today!

Tuesday, July 17, 2012

Window Card

Good Morning Friends! Today I would like to show a card I made inspired by Sheila at She's A Sassy Lady. This is a window card I learned how to make using the Gypsy.

I created and welded a card together with images on page 53 of the Art Philosophy Cartridge handbook, and images from the Wild Card cartridge. I cut the card to measure 5x5. The paper used is from First Addition Papers, Spring Feast collection. The elements were inked with CTMH inks in Blush and Pear before adhearing them down to the front of the card. I used a Zig 2 way glue pen and Prisma Glitter by CTMH for a little shine. The last step was to add a sheet of velum to the front of the card behind the cover, and a white matt on the inside for a place to write a note.
This was fun and easy to do! I hope you like it and  try to create one of your own. Thanks for stopping by today!


Monday, July 9, 2012

Water Bottle Treat Holder

Good Morning! I'm excited to share a project with you today for my post over at the Cricut Is Close To My Heart blog that I came up with while trying to think of a goodie to give our guests during an afternoon at the pool. This is what I have made to show you today:

Using the Art Philosophy cartridge by CTMH, I cut the door hanger on page 25 at 10 inches. On my Gypsy, I eliminated the slit that cuts on the hanger. I used a 1.5 scallop circle punch by Recollections to make the hole a little bigger. This will work just as well leaving that step out.
Next I scored all the score lines. I added a score line 2 inches from the top that is not on the original cut. Please note that this score line can be placed anywhere to work with a different sized bottle. I added some adheasive to the tabs as well. To decorate the holder I used Life Is A Beach and Create A Critter cartridges. I cut the crab and layer at 1.5 inches. The umbrella and layer at 2.5 inches. The "Summer" phrase has a parrot attached to it that I cut off. I cut this at 1.5
I also hand cut a strip of sand colored card stock for the beach. Before gluing down all the pieces, I used CTMH inks in Dessert Sand, Pear, and Lagoon to ink the edges of various pieces. I measured the sand piece to wrap around the bottom.
Next, I used CTMH twine in Creme Broulet to wrap around the back. I was hoping this looked like sun rays. I had a pre- cut cloud shape in my stash that I popped up after gluing down the Summer sentiment. All of the paper used in today's project is Close To My Heart cardstock. The colors are just beautiful. All that is left to do is add a packet of powdered drink mix, a little tube of sunscreen, maybe a treat or two, and this cutie is ready to hang on a water bottle to take to the pool!

This project can be changed up in many ways for any occasion, and it was so fun to put together! I hope you have enjoyed my project for today. Please stop by the blog to say hello or let me know if I can help you with any of your CTMH product needs. Check back real soon to see all the great new items in the Fall/Winter catalogue arriving soon! Have a great day!

Thursday, July 5, 2012

Friend Card

Good Morning Crafters! I hope you all enjoyed your 4th of July! No fireworks in our area of Colorado this year, but that is OK. Much thanks to all the firefighters and all the men and women who are working so hard to put out the fires in our beautiful state! We had a great day with family visiting from California and a fun trip to the pool to cool off with all the kids afterwards. Between my 3 brothers and myself, there are 10 Grandkids and we were all together in one place for pictures with Granny and Grandpa!
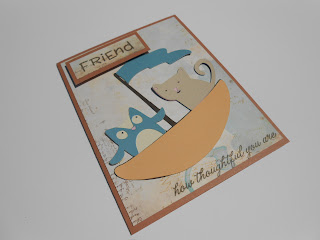
So now on to my card for today! The card I am posting today is a card I made for a friend as a thank you for a birthday gift I received from her. She loves owls, so the Cricut Give A Hoot cart was perfect. This is an A2 size card.
The image is cut at 3.5. The solid colors and card base were cut from CTMH paper. The patterned paper in the background is from BO BUNNY. The stamp set used is from Recollections. This set is all about friends and has different fonts for the sentiments.
The "Friend" sentiment is the only element I chose to pop up for some dimension this time. So simple and easy to put together. I thank you for stopping by to have a look today! Have a great day!


Thursday, June 28, 2012

Simple Hello

Good Morning! Today I would like to share a card with you I created for the Cricut is Close To My Heart blog which showcases projects created with Close To My Heart products. Click HERE
 for my shopping page.
This is a very simple card made from the Dotty For You paper pack. These double sided papers all coordinate together, and the colors are just so fun. I have cut the card base to 5x5 and rounded the corners. The yellow layer was cut at 4x4. The diagonal strips were scrap pieces cut into one inch strips, then lined up and the edges trimmed off. The stamp set, A Tree from CTMH, was used for this card. Stamped on the green paper from the pack and hand cut. The butterfly and sentiment are also in the set.
I then added CTMH twine in Smoothie around the layer. This was easy to do as there was just the slightest edge from the layer, so the placement was straight. The cut out tree was then popped up on foam tape and placed over the twine for some dimension. I added some little stitch lines for the butterfly to show direction. For just a touch of bling, I added some Liquid Glass detail to the tree and sprinkled Prisma glitter before it dried. The card edges were inked with Blush ink and the images were stamped with Olive ink.
There are just a few days left in June. Just enough time to check out the CTMH promotion on stamp sets. It is buy 2 get 1 free of equal or lesser value. A great deal. We all need MORE stamps, right?!!!
I hope you have enjoyed today's card. Please come on over to the BLOG for other awesome projects and inspiration! Have a great day!
 

Tuesday, June 26, 2012

Stamps of Life

Hello crafty friends! Today I want to share a card with you that I made using a new stamp set from Stamps of Life by Stephanie Bernard. I just joined the stamp of the month club and this is the stamp set from June. It is called Turtle2Love. It is just so cute. There are 3 sizes of turtles, different shell designs and some cute punny sentiments. The cost of the club is so reasonable! I love the stamps and all the sets from the company. If you would like to see for yourself, just go to www.stephaniebarnardstamps.com
This card is a 4x4 card made with papers by Recollections. The water layer was embossed with Swiss Dots Cuttlebug folder.I used Liquid Glass to make some tiny bubbles coming from the turtle. The sand layer is kraft color cardstock and I stamped the turtle and shell design from the set with CTMH Olive ink. He was then cut out and pop dotted up.The edges of the layers were torn for that unique look. I scraplifted this cute design from the gallery of photos on Stamps of Life's website, showcasing the Turtle2Love set. Sorry, no name for the creator, but I just thought it was adorable! Thank you so much for having a look today! See you next time!

Friday, June 22, 2012

Anniversary Card

Happy Friday everybody!! I'd like to share the anniversary card I made for my parent's 48th anniversary! Wow that is amazing!  It is an A2 size card, and the base is made from Vineyard Berry CTMH cardstock. I cut a decorative edge piece from the Art Philosophy cartridge and embossed it with a Cuttlebug embosing folder. I used CTMH Vinyard Berry ink to rub on the embossed area for an interesting look.
That beautiful stamp is from CTMH called Quick Cards and the same ink was used on the image. For a little interest, I added some bronze colored brads by Recollections. I also inked some of the edges with the Vinyard Berry ink. Very simple to put together, but I just loved how it turned out. Thank you for stopping by to have a look at my creation today. Have a wonderful weekend!

Tuesday, June 12, 2012

Simple Thank You


Good Morning! Today I thought I would share with you a card I made using a technique I have seen but have never tried before. It was fun, and the creative opportunities are endless. This is a 4x4 card. I made the base from some kraft color cardstock. With a stamp from the Tags, Frames, and Borders set from CTMH, I stamped this image on a square piece of cream colored paper in a close pattern with several inks from my CTMH stash.

 I used my new Martha Stewart Circle cutter to cut a circle from the best area of the stamping. I then cut another circle to mount it on and finally a third scallop circle cut from the Art Philosophy cart.

  The effect the stamping creates is a custom pattern paper designed by you! So fun! I always stayed away from circles, because as most of us know, perfect circle cuts can be hard to come by, lol. This Martha Stewart Circle cutter worked wonderfully.
 I embellished with a few buttons and some CTMH twine. So simple but so cute! Thank you for having a look. Have a great day!


Tuesday, June 5, 2012

Happy Birthday Sean!

Hello again! It is Tuesday and I can't believe I have not posted for a week. It is not because I have not created, because I have been very busy in my craft room, we have just been enjoying being out of school and work for the Summer break! Anyway, today is Sean's 11th birthday and I made this card for him. He is such an animal lover (especially puppies) and I thought he would like this! The cuts for this card are all from Create A Critter. I used the accesory dog house to make a welded shape card on the Gypsy.

This is really fun to do! you can make any image into a card. The little puppy also had other accesories, and I decided to go with this. All papers are from recollections, inked edges using CTMH Black ink. The tiny tag and greeting is from MCT. I used a white Sakura Gelly Roll pen for the faux stitches, some Sew Easy floss, and some foam adheasive for the popped up elements. I hope you like today's post. Thanks for stopping by!

Tuesday, May 29, 2012

Teacher Gift


Good Morning! I hope everyone enjoyed the long weekend. I would like to take a moment to thank all the service men and women, past and present, who give there all so that we may enjoy our freedom, and for the sacrifice of their families. Heart felt thanks to all! Now on to today's post...This is a little gift set for Sean's teacher, that he will give her as a token to thank her for the wonderful year. We are days away from Summer break! The time just seems to fly by. This card is my version of an adorable card from Mary at CARDZ TV. I made it a little different. I used papers from Recollections, cuts from Recess Cricut Lite cart and Art Philosophy, Peachy Keen face stamps, and Tim Holtz distress ink Vintage Photo for the edges.


There is another image on the inside of the card for a little more detail, and the pillowbox was cut from the Art Philosophy cartridge for a gift card and some goodies! I hope you have enjoyed today's projects. Thanks for stopping by, and have a wonderful day!

Thursday, May 24, 2012

Crusin' Layout


Good Morning! For my post today I have created a layout using the CTMH Crusin' paper pack. This pack is so fun and retro looking. I thought it was perfect for a male inspired LO. The cartridges used for my cuts are Nifty Fifties, and Art Philosophy.
I especially wanted to feature this map print paper because I thought it was so fun and the Crusin' paper pack includes coordinating solids so it is easy to match prints without going hunting  for the right colors. The printed papers even have cute edges with sayings or sentiments on the paper ID strip! See the red flag in photo #2?
No stamping for me today, but I enjoyed inking the edges with CTMH ink Grey Wool for some added depth. I also used some Enamel Accents in black to highlight the stars and it was that easy!

Please stop by Cricut Is Close To My Heart blog to see many other creations by talented bloggers. Thanks for looking and have a wonderful day!

Tuesday, May 22, 2012

Graduation Card

Good morning! Today I am posting a card I created for my daughter Samantha. She is graduating from a college program she attended to become a Medical Assistant. She has almost completed her externship at a local Pediatrician's office,and will hopefully gain permanent placement there. She loves it so much. She will be graduating with honors and a GPA of 4.00!! YAY Sam!! we are so proud of her!
This card was inspired by a card I have seen on a blog I follow, and I apologize that I do not have the designer's name at the moment. I love the elegant simplicity of it. All papers are Recollections. The Cricut cuts are from CTMH AP and a Lite cartridge called Recess, for the cap. I also used a rhinestone botton and some little pearls from Close To My Heart. This card is a standard A2 portrait card. I hope you like it. Thanks for stopping by and please leave comments. They inspire me to share my creations with you. Have a great Tuesday!

Saturday, May 19, 2012

4x6 Photo Album

Good Morning everyone, and Happy Saturday!! This morning I thought I would share with you the cover of a 4x6 photo album I created using CTMH products. The paper pack is called Footloose. I used the Art Philosophy cartridge for the cuts on this cover which includes the stamp base and the flowers. The stamp is also from CTMH, available in the Spring/Summer catalog. To get the multi-color look, I just randomly inked the stamp with coordinating colors from my CTMH ink collection till I got full coverage. I inked all edges with Pacifica CTMH ink, added a few brads and some coordinating twine. I made the photo album itself with a Your Story from Provocraft. That is a fun little gadget that allows you to bind your own albums or books from papers, cardstock, or art work. I hope you have enjoyed today's post. Thanks for looking!!